
The crafty details:
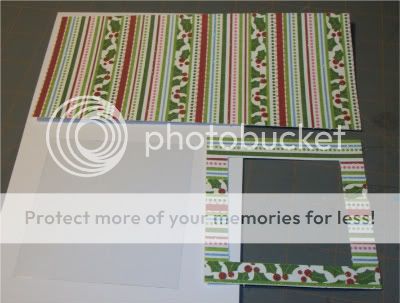

I score the base at 3.5 inches and 4.25 inches, and then with a razor make two little slits between the score marks for the pen.

(I hope you can see the lines in the pictures, I realize it is hard to see on the white.) Oh and before I forget, the pens I purchased at Walmart, and they were in the Christmas section. They are 12 pens for $2, and I am happy with the price, however the jury is still out on the quality. My daughter has somehow managed to destroy two of the pink pens - but that could just be a special talent of hers. For a small gift such as these, they really are sufficient.

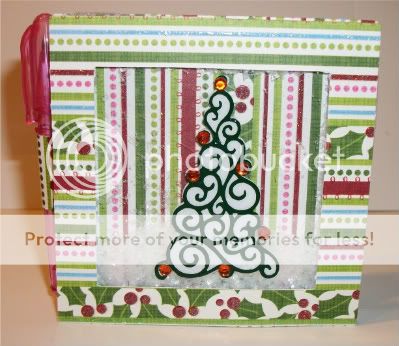
Now for the front I use my ATG to adhere the plastic piece (with my vinyl already on it ) to the paper layer and then I need to make it ready to shake. AND I am happy to say I have a thrifyt little tip for you. Now normally you could use double sided foam tape, like the 3M scotch tape I used on this holder.

This tape is available at Lowes in a big roll, and it is about $10 for a roll of 3/4 inch tape. HOWEVER, if you are like me you might have some adhesive sided craft foam sheets lyting around, and it works just as well. All I did was use my ATG gun to stick up the side that didn't have any adhesive on it.

And as an added bonus, instead of seeing white tape from the side, they see a nice color instead. Then I simply add a small amount of Martha Stewart snowflake glitter (sorry I forgot to take a picture), and then I put the top and bottom layers together.

This does wrap up my post-it shakers for now, but I may have something up my sleeve over the next few days - if the weather and my children cooperate!
Thank you so much for the tutorial, Allison! I love this and will definitely try to make a couple over the weekend. I have tons of Post-It's, and this will be another great way to pretty them up.
ReplyDeleteAnd don't worry! There's no doubt in my mind that the D.L.F. and the M.D.I.T will fully cooperate. It's a part of their sweet and angelic nature to always do their best to make Mommy happy! :o) . . .blink, blink. . . LOL
Oh, how cool is this!!! AnneMaflan did a shout out about this post and sooo glad she did!! Gotta try it!
ReplyDeleteVery neat idea. Thanks for the great tutorial!
ReplyDeleteMichelle
Great job on all of the shaker boxes Allison!
ReplyDeleteDiane