Happy Tuesday! Today is actually a sad day for me - as it is back to school for me *sniff*. But it is also Technique Tuesday over on Paper Craft Weekend Challenge, and Caroline has a great tutorial on embossing. There is also blog candy - so you should definitely check it out! I spent part of my last day of summer vacation *sniff* creating this container to send to my cousin (and former student) who just went off to college. She is at the Ranger School so there is no cell phones, limited internet access, basically stranded in the wilderness! So of course I think a big priority box full of chocolate is just the thing to make her feel better!
The details:
I found these nice plastic containers at the dollar store a while ago, and I thought they would be great for snacks and stuff - we have my daughter's markers in another one - so they are versatile. I used some dark green vinyl and laid out the design completely on my Gypsy before cutting, that way I could transfer it in one piece. The trees are actually from the Christmas solution cartridge and they are cut at 3.5 inches real dial size. (Without real dial size they are teeny!) The font is from Nursery Rhymes and all the letters are cut at 1 inch. Once the vinyl was cut and weeded, I laid down my painter's tape overlapping a few pieces and placed it on the container! Easy peasy and very quick! Here is what it looks like full of goodies:
And I will admit it - I went a little overboard on candy so there is another gallon freezer bag of goodies to accompany this - but hey - candy has no calories when you are in college right?? Well, still time to cry into my pillow the school year is here - but I will get over it I suppose SIGH. Maybe some chocolate would help...
Showing posts with label Nursery Rhymes. Show all posts
Showing posts with label Nursery Rhymes. Show all posts
Monday, September 5, 2011
Thursday, December 30, 2010
Memory Book
Well, as the new year appproaches, I have been thinking a lot about memories (really more about the thousands of pictures I am behind on printing) and I realized I never shared this memory book that I created as a hostess gift for a retired colleague. One of the stresses of my holiday season is to figure out what to bring to this party, since I hate choosing wine for people, and I already bought coffee last year, and he has a thing about eating food he hasn't made, you get the idea. Well they just had their first grandchild, and I cannot tell you the joy it brings to my heart to know that there will be a child more spoiled by his grandparents than my children (seriously - they brought in contractors to re-do their basement for his own area - he is two months old! Love it!!).
Caroline (Caroline's Craftography) had given me this idea by sending me one of LorraineB's videos (Card Creations by Lorraine) and I was hooked after watching the teaser video. She has a whole series of how to create these sweet memory books made with 3 sheets of white paper as a base, and you can see them all by clicking the link here. (As long as you are over there check out the rest of her videos if you have the time, she has the best ideas!) Now, my advice to you is to watch them all before starting (unlike some people I know who thought she would cheat and watch as she made - don't recommend it - oh the words my children probably learned that day). And so now I will shut up and actually post the project!
Caroline (Caroline's Craftography) had given me this idea by sending me one of LorraineB's videos (Card Creations by Lorraine) and I was hooked after watching the teaser video. She has a whole series of how to create these sweet memory books made with 3 sheets of white paper as a base, and you can see them all by clicking the link here. (As long as you are over there check out the rest of her videos if you have the time, she has the best ideas!) Now, my advice to you is to watch them all before starting (unlike some people I know who thought she would cheat and watch as she made - don't recommend it - oh the words my children probably learned that day). And so now I will shut up and actually post the project!
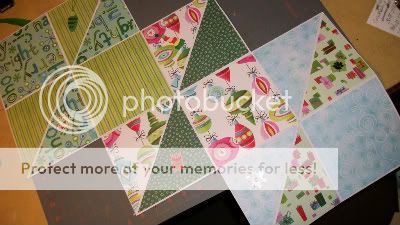
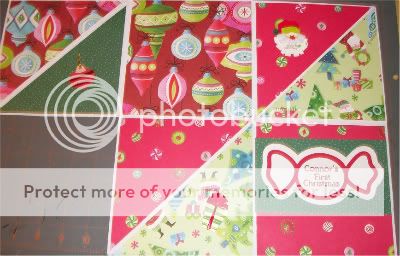
front - all wrapped up
front side - open
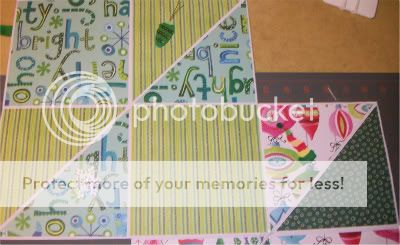
back side open
closeups of front paper
closeups of back paper
The crafty details:
For the front cover I used the candy cut on the Gingerbread Seasonal Cart, and cut it out in red and white paper. I used my Cri-kuts gel pens to draw the title using the font on Nursery Rhymes, and then colored it in with a red marker. The paper is all from the K and Company Secret Santa stack which I loved so much I may have had to go out and get a second stack for just in case. I added some sticker from my stash, but I don't know if I would do that again, because they add to the bulk of the book when you fold it up.
I totally can't wait to try this again, and I have a colleague expecting a baby soon, so I am looking forward to doing it in baby paper. My only complaint is the centers of the white paper started to get worn from the folding and unfolding even before I was done, but it must have been the paper I used. I shall have to ask Lorraine what brand of cardstock she used. Oh, and I didn't really like doing so much cutting with the trimmer to create the squares and trianngles so I created a file that uses George to do it for me! I am willing to share if anyone wants it, just shoot me an email. (....which reminds me my gypsy is not updated, so I better get on that)
Monday, November 15, 2010
Princess Party Week - Accessory Tubs
Did y'all know you can make glitter vinyl??
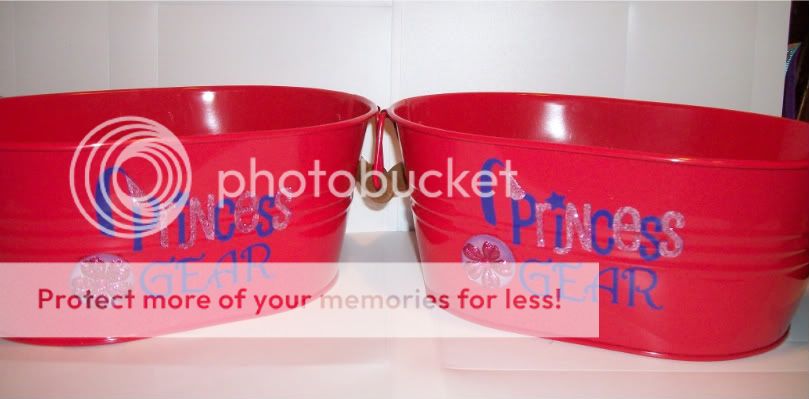
What is a princess party without Princess Gear?? Thanks to my love of ebay and ebay's close friend, Oriental Trading Company, I was able to invest in some princess accessories to set the tone for the party. After all, what little girl doesn't love to play dress up? I got crowns off of ebay and necklaces, bracelets, and rings at OTC to set out for the girls to princess-ify themselves. The ebay seller of the crowns was cheapbids4u and from the picture in the listing I really wasn't expecting too much, but they ended up being really high quality for the price - sturdy and very sparkly!
The crafty details:
These are two dollar tubs from Target and the "Princess" is from Once Upon A Princess, and the "gear" uses the font on Nursery Rhymes. I used some purple vinyl to cut the princess phrase at 2 inches, and the "gear" at one inch. I also added an inked circle of grungeboard with a Prima flower on it (so I can use that flower again!!)
How did I get the vinyl to get its bling on?? My trusty Xyron off course. I cut the layers in white vinyl and ran them through the Xyron. Now this process is not for the weak glitter-hearted, because when you peel it off both sides are sticky, so you kind of have to stick it to your finger, shake the glitter on, brush off the excess and apply quickly. The results are so cool though, it is totally worth it.
I set these on a table near the entrance to the movie theatre so the girls could accessorize as they came in, and it also ended up being a party hot spot, as they spent a good deal of the party running back and forth to get more bling!
Subscribe to:
Posts (Atom)


