


The crafty details:
Well my Glitter It experience was not a 100% positive one, mostly because I followed the directions too closely. The first step is to clean out the inside of the ornament with a vinegar and water solution and let it dry. I skipped that for the first couple but then did not get the desired results so I went back and did it for the rest of them.
Here's the problem I have with the directions: they say pour a small amount in and that should be enough. Now I don't know what their definition of small amount is but it definitely does not match mine. So here's MY advice - unscrew the top and pour a generous amount into each one and swirl it around. Then pour the excess back in the bottle. Then again, my definition of small amount of glitter did not match theirs. Pour enough in to cover the inside, and if it looks like it is not covering, pour some more. I will admit that this was very hard for me since I like to covet my glitter, and not actually use it.
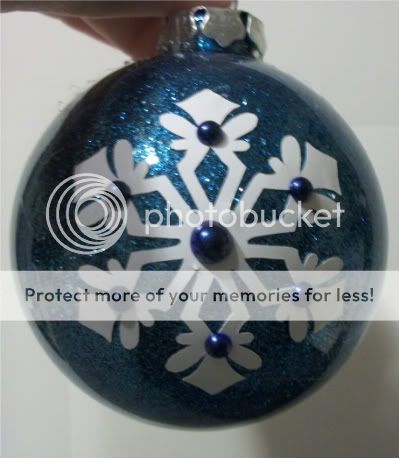
All of the snowflakes are from the Winter Frolic cart, and the cross is from the Easter cart (with all the inner lines hidden). Here's a tip, the "round snowflake" cuts are not your friend and do not work very well on the balls. After putting two of them on and fighting with the vinyl, I gave up and stuck with the flakes that worked. Transfer tape is really not your friend for this typo of work, you have to suck it up and work without it. Smooth with your fingers and you will have an easier time. Then when I was done I couldn't resist adding adhesive pearls and gems to bling them up. These ornaments are mostly going to the teachers who work at my daughter's school.
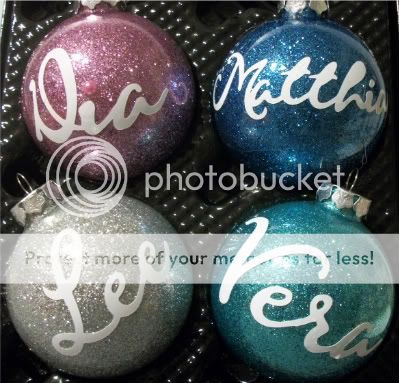
This next set I created for friends who have a Christmas party each year. I used Gypsy Font to personalize each with their name, and then the opposite side has the snowflake.

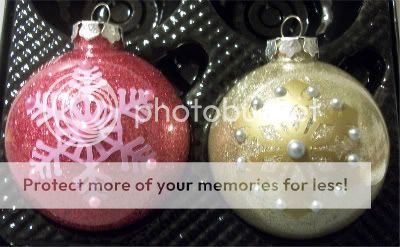
This is the only ornament I used the MS snowflake glitter on and I can't say I love the results. I added white glitter after the snowflake glitter to fill in the gaps and I added a cut from A Child's Year using some sparkly vinyl.

I don't know who this ornament is for, I don't know if I like it enough to give it to anyone! These really were a terrifically easy gift to make - the only thing that takes any length of time is the drying after cleaning it out with vinegar and water. Otherwise, you probably could get a bunch done in an afternoon.
That's all for now, I do have a few more projects to post this week, if I can get them all made, photographed and written. I will do my best!
You've been a busy girl! :)
ReplyDeleteI absolutely love these! I have no idea how you have the skills/patience/confidence to use vinyl without transfer paper. I am a little afraid to try it for that reason, but your ornaments turned out so spectacular, that maybe I will have to venture out and see if I can do it. I love, love, love these glittery ornaments! The idea of personalizing them for host/hostess gifts is just great!
ReplyDelete