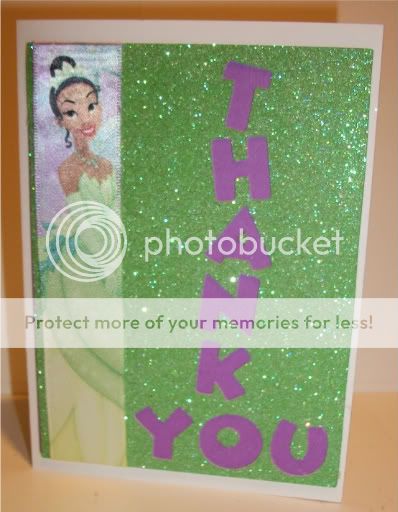
As we come to the end of Princess week, I have to round out the week with the thank you cards. It took me quite a while to decide on a design that I like for these cards, but once I did they were fairly easy to put together. I did three variations of the same design, because I tend to get bored mass producing the same thing, so I decided to play a little bit with the colors.
The crafty details:
The base of the card are the pre-made blank cards that I got on sale at ACMoore. I did not attach the layer to the front until after my daughter was done writing out the inside, in case there was a disaster - I didn't want to waste a completed card!
The top layer is glitter paper from Target, and I created a rectangle using George with the "thank you" cut out using Mickey Font, leaving enough room on the side for the ribbon I found the Princess Tiana ribbon in the craft section at Walmart, and ran it through my trusty Xyron to make sure it stuck. Then I added the bottom layer of plain colored cardstock, adding the center of the O and A, and adhered the whole thing to the front of the pre-made card. Really easy peasy once I was done obsessing over the design.
Why didn't I stick with the frog you might wonder?? I was tired of the dang thing!!! I need a serious break from that frog and its pain in the hiny teeny legs for a good long while.
I was hoping to show you some pics of the party location but unfortunately the camera I took them with is not cooperating. Hopefully I will at some point be able to get them posted. Thank you so much for joining me for Princess Week!
Showing posts with label Princess Party. Show all posts
Friday, November 19, 2010
Thursday, November 18, 2010
Time for the Goody Bags!!
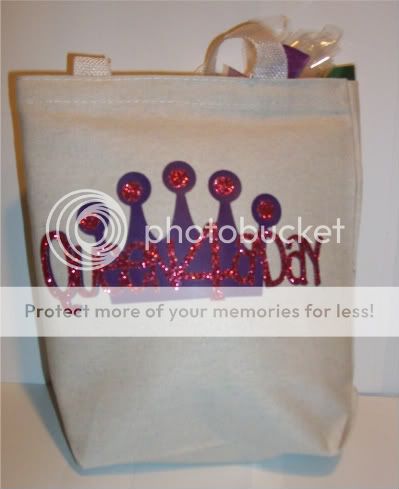
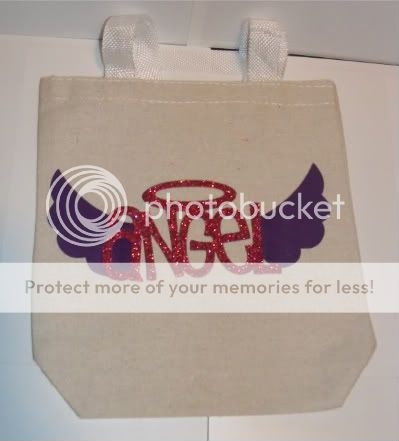
And finally the (what else?) goody bags!!
If you read my first ever blog post, you will know that I admit to going the teensiest, tiniest bit overboard when it comes to the goody bags. And these were filled with all sorts of wonderful things, thank in large part to my Cricut Circle Friends who came to the rescue when I needed more Crayola scrap packs because I could only find 12 in my area. (Some day I shall harness their power and we will take over the world! BWAHAHAHA)
The crafty details:
These phrases are all from Once Upon A Princess and the bags were made using Heat Transfer Vinyl. Once again I get my vinyl from Nick at Craft Vinyl, and they are a plain vinyl base with the glitter top layer. The "angel" and "Queen 4A Day" phrase are cut at 3 inches, while the "Rock Star" is cut at 4. The bags are simply small canvas bags I was able to get six for a dollar at my dollar store.
If you have not tried heat transfer vinyl yet, what are you waiting for?? The process is very easy and super gratifying if you like instant results. These goody bags were filled with all sorts of treats for the crafty little girl and were a nice surprise for the girls at the end of a great party.
Winding princess week down, but thank you cards are up tomorrow!
Wednesday, November 17, 2010
Mini Purse Table Favors
What's a party without table favors??
I absolutely love the Forever Young cartridge and I thought this was just the excuse I needed to use it! These were to go at each seat at the table, and they were filled with lip glosses and mini glitter nail polishes.
These are one of the plain purse options and are cut at 4 and 1/4 inches because with some tweaking on the Gypsy I could get two to a page. The paper is from DCWV Summer Dreams two-sided stack, which I absoloutely love, and so I had a really hard time deciding which papers to use. I will say the papers with glitter were much harder to cut and did not stay together as well as the non-glittered paper. I punched a hole in the front and decorated with some Prima flowers I got on clearance long ago, and some jumbo gem brads for Oriental Trading Company. (Just an FYI, when OTC says Jumbo, they mean JUMBO). The best part was they were simple and easy to put together - I probably spent more time picking out the paper than assembling.
Once again, the girls eyeballed them for at least an hour before they dug in, first there was plenty of discussion about which purse they would be picking, and then when I gave the go ahead, the comparing of lip gloss and nail polish. And in case you were wondering, they did get some dancing and coloring in too.
On the schedule for tomorrow?? The goody bags of course!
Tuesday, November 16, 2010
Princess Party Week - Centerpieces
Time for the centerpieces!
Now initially we were supposed to have the party in the movie theater and the adjoining cafe area, so I had planned for a bunch of small round tables. Due to scheduling conflicts, we ended staying in the theatre area but I still was able to use all my centerpieces.
The crafty details:
These are target dollar pails, and I went back to using my frog prince, cut at 2 1/2 inches for one side. Since I was using vinyl (and had learned from the invites) I used my Gypsy to make sure that the legs were cut of out his tummy, instead of having to layer additional tiny leg pieces. But again, I used the white vinyl and some Martha Stewart glitter to give him some extra sparkle. I also used my I-rock on the crown for additional bling.
On the reverse side, the happy birthday phrase is from Create A Critter, and cut at 1.60 inches , the number 5 is from from Sweet treats cut at 2 1/2 inches. I also uses the font crown from Once Upon A Princess cut at .60 inches and just layered it on top of the 5 at an angle. Again, that crown needed a little glitter sparkle, but by this time I had gotten tired of using the I-rock, so only one gem as the dot for the "i".
Then I filled the pails with lollipop flowers made from George and Plantin schoolbook, the flowers are cut at 3.75 inches, and are a fabulous idea I got from Kathy Orta. The Tiana decorations were supposed to be hanging ones that I got for like 99 cents at Oriental Trading Company, and I cut little slits in them and put them on sticks instead of wondering if there would be a place to hang them.
These were also a hit and actually survived about 2/3 of the party before the girls busted into them...oh the slaughter.....at least they did admire them before throwing away my pretty paper!!
Up tomorrow - party table favors!
Monday, November 15, 2010
Princess Party Week - Accessory Tubs
Did y'all know you can make glitter vinyl??
What is a princess party without Princess Gear?? Thanks to my love of ebay and ebay's close friend, Oriental Trading Company, I was able to invest in some princess accessories to set the tone for the party. After all, what little girl doesn't love to play dress up? I got crowns off of ebay and necklaces, bracelets, and rings at OTC to set out for the girls to princess-ify themselves. The ebay seller of the crowns was cheapbids4u and from the picture in the listing I really wasn't expecting too much, but they ended up being really high quality for the price - sturdy and very sparkly!
The crafty details:
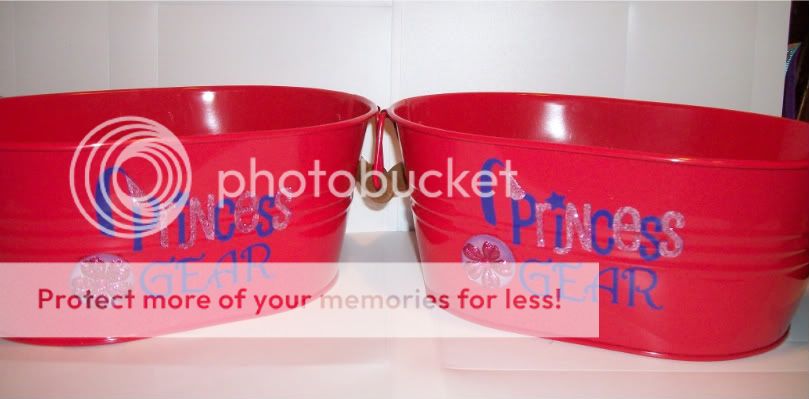
These are two dollar tubs from Target and the "Princess" is from Once Upon A Princess, and the "gear" uses the font on Nursery Rhymes. I used some purple vinyl to cut the princess phrase at 2 inches, and the "gear" at one inch. I also added an inked circle of grungeboard with a Prima flower on it (so I can use that flower again!!)
How did I get the vinyl to get its bling on?? My trusty Xyron off course. I cut the layers in white vinyl and ran them through the Xyron. Now this process is not for the weak glitter-hearted, because when you peel it off both sides are sticky, so you kind of have to stick it to your finger, shake the glitter on, brush off the excess and apply quickly. The results are so cool though, it is totally worth it.
I set these on a table near the entrance to the movie theatre so the girls could accessorize as they came in, and it also ended up being a party hot spot, as they spent a good deal of the party running back and forth to get more bling!
Saturday, November 13, 2010
Princess Party Week Begins!!
Well in case you couldn't tell from the blog name, birthday parties are one of my favorite things to do! And I have finally gotten together all the pics from my daughter's last party, so that I can share them with you. I initially tried to put everything into one blog post, but when it began to resemble an epic I decided to break it up a little bit, so I hope you can join me for Princess Week here on my blog!
This year's theme was Princess Tiana, she has been talking about it since the Princess and the Frog came out, so I have had a while to plan and scout out my options. Unfortunately, Provo-Craft has not yet come out with a new Princess cartridge (SIGH), so we had to be a little creative. They do however have a frog prince on Once Upon A Princess so that is where we started.
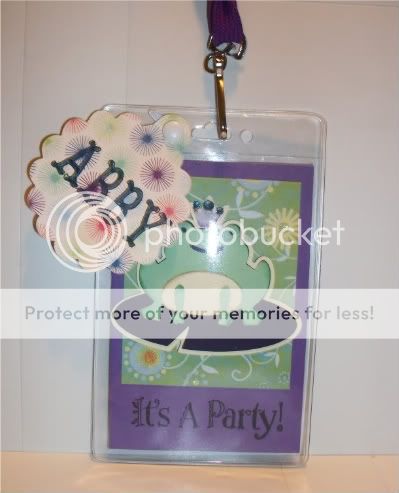
I had the bright idea to place the invitation on a lanyard, sort of like a backstage pass. I had planned on making the lanyards but then I remembered ebay!! I was able to get 24 of them (with the plastic sleeve) for less than a dollar a piece and, more importantly, in Princess Tiana purple.
The crafty details:
Using the lanyards meant that the invites are actually rather small, I think they ended up being maybe 3 and 1/4 inches by 4 inches. The printed paper is from a DCWV Pocket Full of Posies stack and the stamp is a Studio G. I did not have enough of the printed paper to do all 16 invites in the same color so half were blue and half were green.
This year's theme was Princess Tiana, she has been talking about it since the Princess and the Frog came out, so I have had a while to plan and scout out my options. Unfortunately, Provo-Craft has not yet come out with a new Princess cartridge (SIGH), so we had to be a little creative. They do however have a frog prince on Once Upon A Princess so that is where we started.
Starting with the invitations...
I had the bright idea to place the invitation on a lanyard, sort of like a backstage pass. I had planned on making the lanyards but then I remembered ebay!! I was able to get 24 of them (with the plastic sleeve) for less than a dollar a piece and, more importantly, in Princess Tiana purple.
The crafty details:
Using the lanyards meant that the invites are actually rather small, I think they ended up being maybe 3 and 1/4 inches by 4 inches. The printed paper is from a DCWV Pocket Full of Posies stack and the stamp is a Studio G. I did not have enough of the printed paper to do all 16 invites in the same color so half were blue and half were green.
The frog prince is cut at 1.85 inches and as you can see from the close up I inked the top layers of every dang little frog which was a huge pain in the hiny!! But I have to admit, it really made a difference in how nice it looked. I used heat set gems on the crown, and the frog is pop-dotted on the front of the invite. The inside had a pic of Princess Tiana and all the important party details. Attendees were told "princess attire is suggested but not required".
Instead of putting them in envelopes, I made tags for them using the scalloped circle from Mini Monograms, the charm circle from George and Basic Shapes, and the font from Storybook. Welded together, they were about 3 inches high, and I attached them with a brad.
How did I get the names on? At the time I used a gel pen with a rubber grip, but this would be another spot where Cri-Kuts would come in handy. In my gypsy file, the first layer of the design held the names sized to fit within the tag, while the second layer was the tag shape. Using the pen, I drew the names on the paper first, and returned to the design without unloading the mat. Then I selected the second layer, switched out the pen for the blade housing, changed the pressure, and cut the tags out with the blade. The last step was to color them all in with a marker. I liked it better than trying to roll up the lanyard to fit in an envelope.
These invites were daughter-approved and they were a HUGE hit with the girls. I heard about them constantly from parents the weeks in between the invite and the party. The best part - some of them even wore them to the party so I know they weren't thrown out!
Stay tuned tomorrow for any princess's best friend - accessories!
Subscribe to:
Posts (Atom)