Showing posts with label MS Markers/Pencils. Show all posts

Wednesday, July 27, 2011

Cricut Marker and Shrinky Dink Tutorial

Christmas in July is continuing here with a tutorial of how to combine the Cricut Markers with Shrinky Dinks for a whole bunch of fun and some cute projects! I decided to make a snowman charm using Winter Frolic and you really can make anything  - but it tends to be easiest when the cut has a shadow layer. I also have written these directions for someone using the Gypsy. I do not know if the layers would line up correctly using the "old fashioned" method.

The details:

I begin with my snowman shape on one layer, and the shadow directly behind it on the second layer.

You can also see I added some circles from George to create a spot for the finding to go through. (I need to resize them - I thought they were a little big for the final product.)

I put my marker in the machine, set for low pressure, and "cut" the first layer which draws the outline of the snowman for me.


This next step is important, instead of unloading the mat, I select Return to Design. If you unload the mat, the design won't be centered.


I move to the second (shadow) layer of the gypsy design. Then I swtich out the marker for the blade housing and change the settings. The settings that have worked best for me are: Blade depth 6, Max pressure, and Multi-cut of 2.


This cuts out the shrinky dink around my image and gives it a nice border, resulting in this:


Now I am ready to decorate and color my snowman  and make him adorable.  Here he is all ready to be baked.


I used a Peachy Keen stamp with Staz-On ink, I used Sharpie markers for the hat and gloves, and some watercolor pencils for the nose and cheeks. I put him in the toaster oven at 325 degrees until it curls up and then lays flat, which brings me to my final product.


I started out with a three inch snowman and my final charm is about 1.5 inches and (I think) super cute!. I hope the directions are clear and encourage you to start cutting and shrinking!

Friday, March 11, 2011

Cars Card and Pail Set

I know! Another card! I am on a card streak for some reason, but I hope to be back to crafts soon - and then dare I say it - layouts??

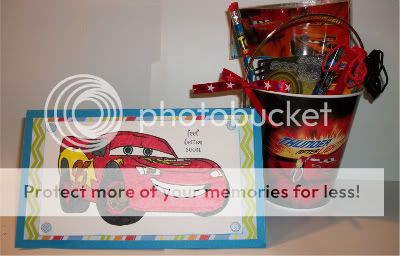
This particular card was born out of a thread on the Cricut Circle message board - Myamagoo asked if you could use your Cricut Markers with copics or watercolors so I decided to experiment! As an added bonus, I had already put together this basket for a little boy recovering from surgery so it ended up being a multi-tasking project!

Front of card:

Inside of card:

The details:

This is not a traditional size card - I actually don't remember the dimensions  - is long and skinny an official card size??  - but I wasn't too concerned since I wasn't mailing it. Lightining McQueen was drawn with the Cricut Markers at 3 inches. Then I colored him in using my Martha Stewart watercolor marker set. I used the blending pen when I was done but if I got it on the Cricut marker line it did bleed a little bit. I was pretty happy with the result. Then I added a sentiment stamp and cut with a paper trimmer in a rectangle around him. I added a layer of scrap paper from DCWV Nana's Kids Stack and added some Oriental Trading Company brads to the corners. You can't see in the pic but the brads have wheel like swirlies on them - I know  - here I go again with the real official craft talk.

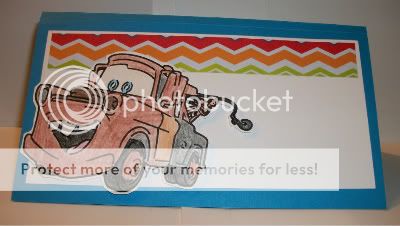
Mater was drawn with the markers at 3 inches and colored in with Martha Stewart watercolor pencils. I used a Prismacolor blending pencil over the top after but I have to say I was less happy with the result - of both the pencils and the blending.  I didn't really think ahead and plan a shadow layer cut so I did have to hand cut around him but it wasn't too much of a chore. Then I added a strip of the same paper to the inside (I had to - blame Joy at Obsessed With Scrapbooking - I think it is a card law) and pop-dotted Mater on the inside.

Since this began life as an experiment it was easy to put together - which is my favorite kind of card! I may have one more card for you - but we'll see what happens!