Showing posts with label MS Glitter. Show all posts

Friday, December 9, 2011

Holiday Blog Hop & Snow Globe Ornaments

Hello all! Today is the Holiday Blog Hop for the BugBytes Design Team. This is your last stop on the hop and you should have arrived here from Melissa's blog, and when you are done, make sure to go back to Pam at TheBugBytes so that you can add your holiday project to the linky! If you are joining this party already in progress you can also start the hop with Pam's blog!

Apologies to my regular followers for being a bad blog mommy lately and neglecting my blog, I have projects done just no time to write the posts! And more apologies to the hoppers because I really love this project but it totally does not meet the requirements of having red or green or silver or blue. So what my migraine medicine is telling me is that I should go with my inner lawbreaker and say since there is purple in this project and red + blue = purple then this project qualifies. Yeah - let's go with that!!


The details: 

This is a snowglobe ornament that I picked up at Michael's  - they come in two pieces and allow you to place something in the middle. I decided that they were dying to be made into snowglobes and I have had this idea for a long time - so glad it actually worked out! This is also another one of my "recycling" projects because I used my cartridge clamshells as the center of the ornament! (I have a few clamshell pieces....or perhaps a alot). My original photos are taken on my daughter's purple Christmas tree so I thought I would take some without the distracting background so the directions would be clearer.

 I cut a 3.05 inch circle out of the clamshell using my Gypsy - and yes it has to be that size - 3 inches is too small and 3.10 is too big and then placed a 2 inch snowman from Winter Frolic cut in vinyl with some of the layers on one side of the plastic circle. I flipped the image and all the layers and placed the other snowman on the other side of the plastic circle, layering it as exactly as I could over the first snowman. I stamped two different snowman faces using my Peachy Keen Stamps and Stazon ink and colored in the nose with an orange sharpie. I felt like he needed some bling and I especially appreciated I could use two different kinds - one for each side! Who wants buttons when you can have MS mini bling??

I added some Martha Stewart snowflake glitter to one half of the ornament, placed the circle over it, added glitter to the other half and sandwiched them all together. I did add some glue to the inside rim but I am not sure a) that it was necessary or b) that it really worked. Since this was going in my daughter's room I mixed some glow in the dark glitter with the snowflake glitter too, but you can only see it when the lights are out. Oh well - it was still fun!

This project just reinforced my love of vinyl + acetate - they are a match made in crafting heaven! My only regret is I only bought two of these ornaments which means a trip to Micheals is now a necessity and I don't know when I will have the time! I will strive to post my other snowglobe ornament next week.

Make sure you go back to Pam at TheBugBytes and particpate in the linky party! And in case you need it, here is the full blog hop list:

  1. Pam 
  2. Jeannie  
  3. Jen 
  4. Carole
  5. Lisa Brooks 
  6. Audrey  
  7. Mila
  8. Sheila aka sassylady 
  9. Elizabeth 
  10. Kelly Millet 
  11. Dayna Sabrina 
  12. Lori   
  13. Denine Vajja
  14. Melissa 
  15. Allison - you are here! :)    


I hope you found lots of inspiration and have a wonderful holiday season! Happy crafting!


Tuesday, January 25, 2011

Guest Designer today at Tuesday Treats

Although I have been busy, and sadly not getting in my daily dose of crafting, I did find the time to create one of my Post-It Shaker holders (this time with a Valentine's theme) for Tuesday Treats! Thanks so much to Pam aka TheBugBytes for having me!


This cute project was created using George and Gypsy Wanderings, and of course some Martha Stewart glitter. For all the details, please visit Tuesday Treats!

Sunday, December 19, 2010

Glitter It Up!

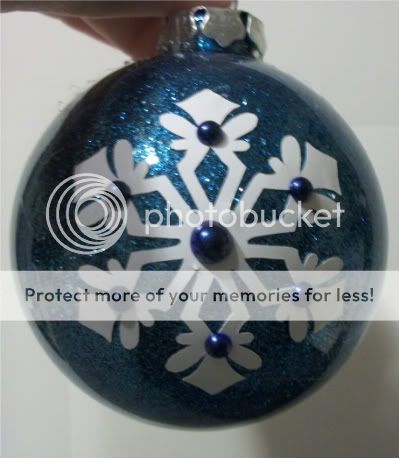
I decided I would try the infamous glitter balls that I heard so much about and I really expected to do about 6, but 15 later is when I actually said enough. Now I had initially planned on using the floor wax method that I had heard so much about, but I saw this product called Glitter It at ACMoore and then the next week it was featured on My Pink Stamper, so I decided to give it a shot. And here are all the results:


The crafty details:

Well my Glitter It experience was not a 100% positive one, mostly because I followed the directions too closely. The first step is to clean out the inside of the ornament with a vinegar and water solution and let it dry. I skipped that for the first couple but then did not get the desired results so I went back and did it for the rest of them.

Here's the problem I have with the directions: they say pour a small amount in and that should be enough. Now I don't know what their definition of small amount is but it definitely does not match mine. So here's MY advice - unscrew the top and pour a generous amount into each one and swirl it around. Then pour the excess back in the bottle. Then again, my definition of small amount of glitter did not match theirs. Pour enough in to cover the inside, and if it looks like it is not covering, pour some more. I will admit that this was very hard for me since I like to covet my glitter, and not actually use it.

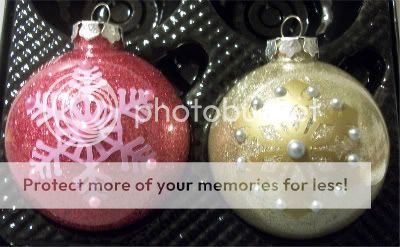
All of the snowflakes are from the Winter Frolic cart, and the cross is from the Easter cart (with all the inner lines hidden). Here's a tip, the "round snowflake" cuts are not your friend and do not work very well on the balls. After putting two of them on and fighting with the vinyl, I gave up and stuck with the flakes that worked. Transfer tape is really not your friend for this typo of work, you have to suck it up and work without it. Smooth with your fingers and you will have an easier time. Then when I was done I couldn't resist adding adhesive pearls and gems to bling them up. These ornaments are mostly going to the teachers who work at my daughter's school.
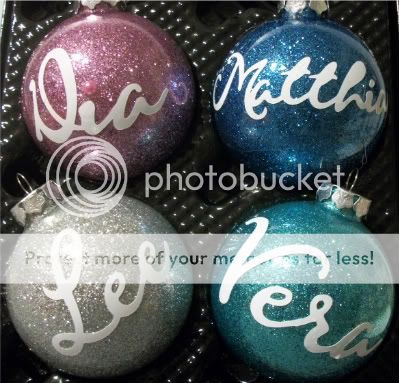
This next set I created for friends who have a Christmas party each year. I used Gypsy Font to personalize each with their name, and then the opposite side has the snowflake.


This is the only ornament I used the MS snowflake glitter on and I can't say I love the results. I added white glitter after the snowflake glitter to fill in the gaps and I added a cut from A Child's Year using some sparkly vinyl.
I don't know who this ornament is for, I don't know if I like it enough to give it to anyone! These really were a terrifically easy gift to make - the only thing that takes any length of time is the drying after cleaning it out with vinegar and water. Otherwise, you probably could get a bunch done in an afternoon.

That's all for now, I do have a few more projects to post this week, if I can get them all made, photographed and written. I will do my best!

Thursday, December 16, 2010

Oh Christmas Tree and a Tutorial

The suspense is over, and my tutorial is finally here! Let's begin,  shall we?

The crafty details:

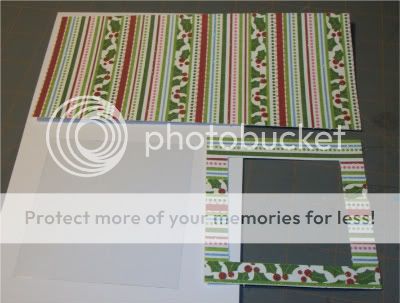
I begin each one with a 7.75 by 3.5 rectangle for the base, a 3.5 inch square of paper for the top layer, as well as a 3.5 (maybe even cut the teensiest bit smaller) inch square of plastic clamshell. I do have a Gypsy file for the base and top layer, but it really was easier to just cut the clamshell on my little Fiskars guillotine trimmer.
I score the base at 3.5 inches and 4.25 inches, and then with a razor make two little slits between the score marks for the pen.

(I hope you can see the lines in the pictures, I realize it is hard to see on the white.) Oh and before I forget, the pens I purchased at Walmart, and they were in the Christmas section. They are 12 pens for $2, and I am happy with the price, however the jury is still out on the quality. My daughter has somehow managed to destroy two of the pink pens - but that could just be a special talent of hers. For a small gift such as these, they really are sufficient.


Now for the front I use my ATG to adhere the plastic piece (with my vinyl already on it ) to the paper layer and then I need to make it ready to shake. AND I am happy to say I have a thrifyt little tip for you. Now normally you could use double sided foam tape, like the 3M scotch tape I used on this holder.

This tape is available at Lowes in a big roll, and it is about $10 for a roll of 3/4 inch tape. HOWEVER, if you are like me you might have some adhesive sided craft foam sheets lyting around, and it works just as well. All I did was use my ATG gun to stick up the side that didn't have any adhesive on it.

And as an added bonus, instead of seeing white tape from the side, they see a nice color instead. Then I simply add a small amount of Martha Stewart snowflake glitter (sorry I forgot to take a picture), and then I put the top and bottom layers together.


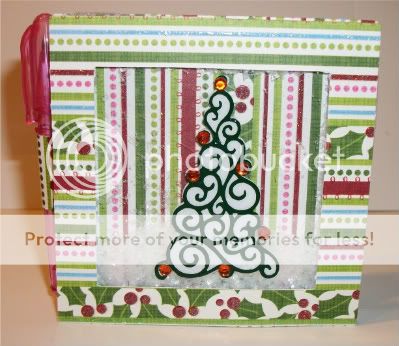
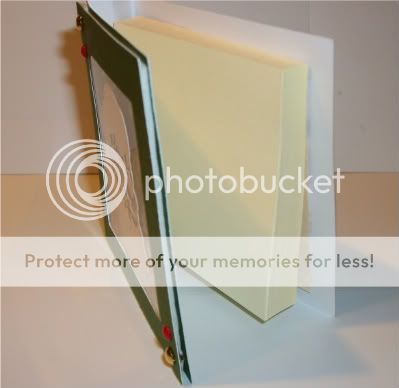
And this is the finished product! I layered the vinyl today, using one of the trees on the Christmas Solution cartridge, again cut rather small at 2 inches (or a smidge less), and then added some bling using my I-rock. I would not have attempted the tree this small with paper because I don't think the cuts would have been as smooth. I actually think this one turned out the nicest, and it might just be my favorite. Here is a side view to show the dimension.

 
This does wrap up my post-it shakers for now, but I may have something up my sleeve over the next few days - if the weather and my children cooperate!

Tuesday, December 14, 2010

Shake it Santa!

Shake it up week is continuing here with yet another post-it holder, this one also featuring Santa. This one is a little more subdued then my other designs, so I imagine I will probably give this design to some of my male colleagues.
The crafty details:

In case I haven't mentioned it yet, the paper I have been using this week is from the DCWV Winter and Christmas stacks. Santa is from the new Trim the Tree cartridge, and if he doesn't look exactly the same it is because I liberally used the hide contour feature on my Gypsy as I didn't really love the image as it was (and maybe the teensiest bit because I didn't want to weed all those pesky teeny vinyl pieces). As with the shaler yesterday, Santa is done with vinyl, directly applied to the clamshell piece. I didn't want it to be too plain, so my daughter actually helped me put the brads in the corners to give it just a little more detail.

Another post it holder is coming up tomorrow, along with that tutorial - I promise!

Still Shaking....

Today's post-it holder incorporates vinyl, which in case you haven't figured it out is one of my personal fav crafting mediums. I had this vision in my head of looking out a window and seeing Santa and this is the realization of that.
The crafty details:

This project would not be possible without my Gypsy, and I began by designing a window shape in my 3.5 inch square for the top layer. I just put 4 smaller squares and eyeballed where they belonged. Then after I cut the piece out,  I inked the edges with a Studio G stamp pad,.

The Santa and reindeer are cut very small (I want to say less than an inch and a half but don't know without checking the G file), which is something that vinyl is perfect for, because it is much more forgiving than paper with smaller and intricate cuts. However, I did hide a number of contours on the cut itself so there weren't too many teeny pieces to weed - I am not that patient! I applied the black vinyl directly to the plastic clamshell piece and then added the "window frame" on top. I again backed it with foam tape, added the snowflake glitter and attached it to the body of the holder.

I promise I am working on a pic tutorial to be posted this week and I still have a few more of these up my sleeve if you want to stay tuned! 

Monday, December 13, 2010

Shake It Up Baby Now! Post-it Holder

I am really in love with this next project, especially because it combines two of my obsessions - post it holders and shaker cards! I am going to feature a number of these this upcoming week, as I think these will be my gifts to my colleagues for this holiday season.


The crafty details:
I started out with a 7.25 by 3.5 inch rectangle for the base. Using a score board you score at 3.5 and 4.25 inches. Then between the score marks make two slits with a razor for the pen.

The top layer of the front is a 3.5 inch square with a 2.5 inch square cut out in the middle, and a layer of plastic behind it. The clear plastic is from the clamshell that the Cricut cartridges come in! Don't you just love recycling? I cut them apart as I load and link my cartridges and re-use the plastic in my projects.

My snowman was cut at 2.95 inches and he is from Winter Frolic. I cut the bottom layer  of the snowman as he wouldn't have any facial features so I could use my Peachy Keen Stamps (they were feeling neglected). I tied a little chiffon ribbon around his neck for a scarf and sealed it with a heat set gem using my I-rock.

Then I outlined the outside of the top layer with some foam tape, and placed some Martha Stewart snowflake glitter (which I am love in with and want to use on everything) in the center and very carefully placed the two layers together.

The post-its I got from Staples a few weeks ago when they were 12 for a dollar (and this was accomplished by totally stalking the store waiting for them to get a new order in before the sale was over and bringing my daughter with me so she could get some too) and the mini pens are from the Christmas section in Walmart.

Stay tuned over the next few days for more shaker post-it holders! I am working on a pic tutorial so you can spread the shaker love!