With that out of the way, I was also thinking about Okie, since it was her blog that led me to Enfys, and how she makes me buy stuff I don't know I want until I read her blog (really... she makes me), and how she recently convinced me to buy the Cri-kuts gel pen and holder. Now, I am (or maybe was is a better choice of words) a Cricut marker girl. I love using those markers (again - future post alert) and when I wanted a thinner line? I did it the cheap way, also known as puttting a rubber grip on a Hannah Montana mini gel pen taken from my daughter when she wasn't looking. BUT I just may be a Cri-kuts convert because I love, love, love the ease and convenience of using the Cri-kuts. I guess Okie does know what she is talking about (just don't tell her I said that).
Now before you think I just like to talk about other people's work, I promise I did actually make cards.
I bought the value pack of 25 cards at ACMoore when they were on sale, and I was really disappointed with the quality of the paper, however with some extra layers I am happy with the way they turned out.
Because the paper is so thin, I did add an extra layer of cardstock to the inside of the card.
The crafty details:
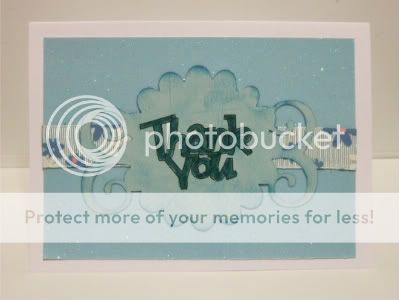
These cards are 4 1/2 by 5 1/2 inches and the mats are 4 by 5 inches.
I used my Gypsy and created the a file with two layers. On the top layer was my "thank you" which is cut at 1.20 inches (Real Dial Size) from Wild Card. On the second layer was this shadow cut from Storybook, cut at 2.60 inches.
I put the Cri-kuts holder and pen in the machine and adjusted the pressure to medium. Then I loaded the mat, pressed cut, and "cut" the phrase with the marker. When it was done I selected Return to Design (don't unload the mat!!), and replaced the marker holder with the blade housing. I re-adjusted the pressure to a higher setting, and selected the next layer with the shape cut on it. Then I pressed cut again, and it cut out the design around my drawn phrase.
Then I used a Martha Stewart gel pen to color in the phrase, and added some white chalk to the edges of the cut to soften the pink a little bit. I used my ribbon stash and put a piece across the center, and then placed the whole cut on top. Incidentally, I used my Xyron to adhere both the ribbon and the cut. It is an absolute must for ribbon!! (but I will try not to wax poetic about the Xyron right now - that's a whole other post)
I have to say I liked the design of this card so much - I made three more!! As an added bonus, all of the cardstock was from my scrap drawers.I just have to figure out if I am going to be able to part with these cards (maybe I will just thank myself).
The other cards:
Thanks for looking! Now if anyone wants to come over and make those princess thank you cards for me - I'll be waiting!


No comments:
Post a Comment