Wednesday, November 23, 2011

Blog Hop Twine Winner

Happy almost Thanksgiving! (and more importantly Black Friday - yay!) I finally got around to drawing the winner for the twine set and according to random.org the winner is...

which means the winner is.....

Congrats Missie! Please email me your address at goodybagdiva@gmail.com so that I can get that twine in the mail for you! And I hope all of you have a wonderful Thanksgiving and a thrifty Black Friday with lots of wonderful deals!


Saturday, November 19, 2011

Nemo Game, Centerpieces, and Mickey Blog Hop!

Hello! we are at the end of my Finding Nemo birthday party week here AND it is finally time for the Me and Mickey's Birthday Hop! Thanks so much Michelle for asking me to hop with  you all and Happy Birthday to Rexann! You should be arriving here from Laura's blog and if you came here directly you can start the hop at Michelle's. Be sure to stop by and wish Rexann a Happy Birthday!

I am going to share with you today the game I created for the kids to play at my daughter's birthday party. Instead of pin the tail on the donkey we played help Nemo find his home! (If you are new to my blog you can check out my other Nemo projects here.)

The details:
The game board is a 12x24 piece of paper and all of the cuts are accessories features on the Best of Pixar cartridge. They were all cut at 11 inches.  To create the "anemone" in the middle I welded two of the cuts together and then did the same with the layer/shadow cuts. By using different shades of pink and doing some light inking I got the anemone effect I wanted. The larger pieces of coral I cut out in different colors and flipped the image for the other side.

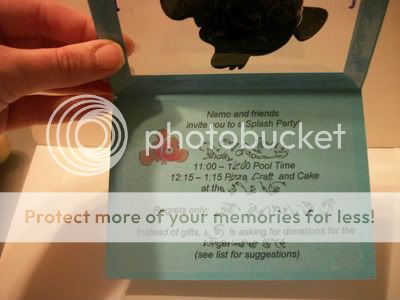
For the game pieces I printed out a bunch of Nemos on my printer and hand cut them out (no way was I putting together more Nemos after doing the invitations) and then I laminated them with my YourStory, well actually my daughter laminated them all and it was lovely because it kept her from pestering me and she thought it was soo cool. Because they were laminated, the girls at the party were then also able to write their names on the Nemos so we could see who put what fish on the wall.

This really was a fairly easy to assemble project - I just wish that PC sold 12x24 laminating sheets so I could laminate the board! (It is the same concept I used for my Halloween Haunted House game I just posted that first.)  Here is a picture of my daughter playing the game (and missing).

And then finally I have some super quick centerpieces to wrap up the party that were a big hit (especially with my youngest who is a candy junkie). This is a scraplifted idea that I got from Carrie aka greenbean on the messageboard and again - quick and easy to put together.

The details: 
With some white vinyl and some 77 cent fishbowls from ACMoore (in fact they are currently that price on sale today) I cut some 6's (1.20 inches and 2.5 for the the larger) using the heart font on Rock Princess and a fish from Animal Kingdom (1.50 inches) and I had a pretty fish bowl to fill with gummy and swedish fish. The middle one I stuffed with tissue paper and stuck in the Nemo light up wand we had bought the year before when we went to see the Nemo on Ice show.

Those fish went face and I am sure because they were in pretty bowls and not just because they were candy (yeah right). Here is a picture of the party room all dressed up!

Over to the left you can see the craft project we made, wooden frames from Michael's covered in glitter with seashells from Oriental Trading.  Here is the sample we made to show the girls what it should look like: 

I highly recommend the Martha Stewart craft glue - it held those shells on like nobody's business!
And here are all the works of art drying: 

Whew!! I am tired all over again just typing all this about the party!! It was a huge success and I was so proud that my daughter was able to fill the back of my car with her donations for the SPCA (and happy I didn't have to bring a ton of toys home). She made a new friend when we went to drop it all off, but that friend was most certainly NOT coming home with us.

And that is it! I hope you got some good ideas here - and I can't wait to see what all the other ladies have done. Your next stop on the hop is LaShavia's blog. I also have some blog candy to give away - I will give away a sampling of Divine Twine to anyone who leaves a comment (make sure you leave a way for me to contact you) - you don't have to be a follower but I would love it if you became one! Happy Mickey Hopping and one last Happy Birthday to Rexann!

Thursday, November 17, 2011

Nemo Tags - Turning a Negative Cut Into a Positive

Today I am going to share with you a quick post about the tags I used on the goody bags for the party. These were pieces that were already cut from creating the invitations, which you can see here. These tags were the window in the invitation that was cut out for the acetate - and being the green person I am (and maybe a little bit cheap) - as I was peeling all those pieces off the mat I really did not want to throw out all that nice paper!


The details: 
So since my tags were already cut out by creating the invitation, all I had to do was gussy them up! I added a picture of Nemo and friends that I printed on a clear adhesive shipping label from Staples and cut out. This really is my favorite way to add text to my crafts - just a quick print and a stick and I am done! I use the large 8 1/2 by 11 size labels so I am not limited to any one size item - if I want to print two big things and one small on the same page I can. 

Then I cut some more of the coral pieces that are on the Best of Pixar cart, did a little hand trimming, ran it through the Xyron and placed it partially over the picture. And I finished off by stamping with a Fiskars stamp, had my daughter sign them, punched a hole and attached it to the pencil bag with some baker's twine. 

I was fortunate to find a Nemo school set at a local dollar store that I used instead of a traditional goody bag. They each had a necklace from this post, a lip gloss and nail polish, and a Finding Nemo watch that I purchased in bulk from this ebay seller. She has a variety of watches with different kids themes available like you can see in this listing and I had a really positive experience purchasing from her - great communication. The girls thought they were terrific and I was proud of myself for my restraint with the goody bag fillers this year. (Yes I do consider that restraint.) 

Saturday I will finish off Nemo week with the Mickey and Me Blog Hop where I am going to share the game I made for the party and some of the decorations! I hope you will join us!


Tuesday, November 15, 2011

Nemo Bottlecap Necklace Tutorial

It is my day on The BugBytes and I am bringing you a quick goody tutorial! Today's installment are the necklaces that I created to go in the birthday goody bags since I was having trouble finding Finding Nemo theme items (oh the irony - it was hard to find Nemo!). For this we chose five of the characters and with some easy steps and almost no time at all I had the necklaces put together. The packaging on the other hand....we'll get to that later, first let me show you the necklaces!


The details: 

I begin by looking up pictures of each character on the computer. I copied them into a Microsoft Word document and in the same document I used a one inch circle shape to make sure each picture was the right size for my bottlecap. Then I printed it out and gathered the rest of my supplies: 
  • Xyron
  • One Inch Circle punch
  • Recollections brand Bottlecaps
  • Jewelry Findingsand Pliers
  • Ball Chain Necklaces purchased from Creative ID Supply
  • Clear Epoxy Stickers purchased from Beadaholique


I gathered all my supplies and begin by centering the circle punch over the printed image. 

After punching the image out, I ran them throught my Xyron machine and then added the epoxy sticker on top before I remove it from the Xyron backing. This made it easier to burnish the sticker over the top and get a good seal on it. 

Then you peel it off the backing, add to the center of  bottlecap, add your finding and chain necklace!

These really are super easy to put together - I put together 25 necklaces in less than half an hour. So if you do this - stop now. Do NOT do the next step unless you are a glutton for punishment. 

I cut a shadow image of each character at 3 inches and added two circles from George on each cut. Then I threaded the necklace through the holes. 

Then I used a piece of double sided sticky tape to position and hold the necklace in place. 

Then I piled the rest of the necklace on and sealed it with packing tape. 

And they were all done and ready to be presented!

But in all honesty - the packaging was a HUGE pain in the hiny and I don't know if I would do it again. Sometimes I am my own worst crafting enemy. I DO however recommend investing in the necklace supplies as a quick and easy party treat - just stop when they are done! The next Nemo installment will be about how I turned a negative cut into a positive!

Sunday, November 13, 2011

Disney Week begins - Nemo Birthday Invites!

This is going to be a Disney week here on my blog as I am going to share with you the creations I put together for my daughter's birthday party and ending in the Me and Mickey Blog hop. Last year she was all about the princess party, and you can see all of those creations here, but this year she decided that it was going to be a Finding Nemo swim party. This presented quite the challenge since Finding Nemo party supplies have been discontinued everywhere except for people trying to scalp you on ebay - so I had to get creative! And so we will being today with the invitations!

The details: 
These are,  believe it or not, regular A2 size invititations, in fact just a wee bit smaller since I had to cut two out of each 8 1/2 by 11 sheet of paper. Those of you who are familiar with the Disney carts will maybe realize that layering the characters at such a small size is a HUGE pain in the behind, but I have a solution - and its name is vinyl! But first some closeups of each design - we chose four of the characters - and I made 8 of each design (because yes I am nuts).

Nemo - cut at 2.25 inches
Marlin - cut at 2.30 inches
Dory - cut at 2.50 inches
Pearl - cut at 2.25 inches
I created a Gypsy file with for my card bases that welded rectangles from Plantin Schoolbook with the waves shape I also found on that cart! Talk about hidden treasures! I wanted a cut out on the front of the card where I could put acetate and then my vinyl figure -I wanted the illusion of an aquarium.  And where did the acetate come from? I used almost all of my stash of the plastic clamshells that Cricut cartridges are packaged in ~ but don't you worry ~ I have worked on replenishing it since then. 

As I said earlier - the characters are cut quite small and I would not recommend doing that with paper because the vinyl made it easy to position the pieces and re-position if necessary. I did not however cut those teeny white eyes out - since I am not completely mad - instead I used a MS paint pen to add the whites for the eyes - worked wonderfully on the vinyl.

To frame the front I cut out some coral (which is also found on Best of Pixar) at 2 inches and flipped the image for the other side. I did a teeny bit of hand trimming on the coral since there was a little piece hanging over each edge. I also added a stamped sentiment from an Inkadinkado wooden stamp. I used Stazon because I was using Recollections brand shimmer paper (also used for the coral) and I wanted to make sure it didn't smear. 

For the inside of the invite, I printed out the details on clear shipping labels from Staples and then just stuck them to the inside. My daughter decided she was foregoing presents this year and asking for donations to the SPCA instead - so the pressure was on for a fabulous party!


Later this week I will share with you the necklaces I made for the goody bags and how I was able to use the negative cut from the invites for tags, and then the decorations and game for the party. Until then I hope you enjoy these - and maybe look into playing with some vinyl!
---Allison

Thursday, November 10, 2011

Blogaversary Winner!

So the long wait is over! And I have to say when I used random.org and then looked up the winner my reaction was NO WAY!! That couldn't happen! But it did, and while I thought about picking another winner I didn't think that was very honest, soooo according to random.org (and here is the photographic evidence):
which means the winner of the Teresa Collins Chic & Scary cartridge is....

So while I am suspicious that Carole might turn out to be the owner of the random.org website you all can rest assured it was purely a coincidence! She really is such a faithful comment poster that I think she deserves it! Carole I will get your cart in the mail - and to the rest of you - I thank you again for choosing to follow me - I am so thankful for that! And I am off to give myself a huge kick in the behind to get caught up on my posts!